Thursday, January 8, 2015

Pork Belly with Salted Fish 咸鱼花腩煲

Happy New Year 2015 to all!!

One of my resolutions this year is to read more books (which is why I bought a Kindle recently) and to write more. I am looking into creating a website for my recipes and tho I don't expect to have a tonne of readers, I am more into keeping this recipes to keep my dad's cooking alive. So, do look out for it ya!

For my first post of the year, I gonna share a recipe of my dad which is simple yet delicious. Pork belly with salted fish is a fairly popular dish in Ipoh town, Malaysia and it is where I tasted this heavenly dish for the first time.

Ingredients:
250 grams of pork belly

Seasoning:
1 table spoon of Sweet dark soya sauce for seasoning
1 table spoon Oyster sauce for seasoning

Chopped garlic
Dried chilli
Red Onions
Salted fish
Oil


Method:

1. Marinate pork belly with seasoning and set aside for half an hour
2. Heat up a pan with oil
3. Once the oil is hot enough, stir fry garlic with dry chilli (the longer you stir fry the chilli, the spicier it gets
4. Add in salted fish
5. Add in marinated pork belly and stir fry evenly under high heat
6. Add in red onion and scoop up after 1 minute
7. Serve!!

Monday, October 14, 2013

Ban Mian 面粉馃

Ban Mian 面粉馃 (Soup Base)
Its been some time since my last post and I felt really bad about it because I should and I could have write more but I am just plain lazy and unmotivated. So, today I am gonna write a quick post about a dish that has a special place in my heart and I can say its one of my comfort food. This dish never fails to put a smile on my face whenever I see it on my dining table.

Ban Mian is also know as Min Fan Gao (in cantonese) and its quite a popular dish in Malaysia and Singapore. In Singapore, the dough its more commonly found in noodles type whereas in Malaysia it comes in different odd  shapes and most importantly it must be FLAT!

The preparation for this dish is divided into 3 parts; the dough, the condiments and the soup.

Ingredients:

Soup:
For quick and easy soup, you can just use those cube anchovies. 1 cube can make a pot of soup enough for 3 pax. For healthier version, you can check out how to make soup using Fried Anchovies.

Condiments for my Ban Mian
Condiments:
Cai Xin - blanch
Anchovies - Fried till crispy
Minced Meat - Marinated with oyster sauce
Meat Balls
Chilli Padi
Minced Garlic
Mushroom (Optional)
Eggs (Optional)

Dough:
Plain flour
Water
Salt

When I was googling for other Ban Mian recipe online, I realized that mine was lacking of mushroom and egg, which I think its really important to this dish. Well, when I have time to have another go and this dish, I'm gonna make sure I don't miss them out again!

Instructions:
Kneading of dough (a video will be updated soon for easier reference)

Soup:
Heat up a medium sized pot with some oil
Sauteed minced garlic till fragrant and pour in 3 bowl of water (750ml to 1 litre)
Put in 1 anchovy cube and let it boil for 20 minutes
Put in meat balls to boil and set aside
Preparation of condiments:
Boil a pot of water and put in some salt
Blanch cai xin and set aside
Marinate minced meat with 1 tablespoon of oyster sauce and add in 1 teaspoon of flour. Scoop minced meat in a ball shape and boil it in hot water for 5 minutes and set aside.
Fried anchovies and set aside.

Ready to cook!
Bring a small pot and place in soup
Heat up and start putting the dough (by pulling small pieces from the main dough and flatten it) into the soup
When the dough starts to float up, (it indicates that the dough is cooked) start putting in all the condiments except for the crispy anchovies
Let it boil for one last time and scoop up
Put in the fried anchovies and its ready to serve!


There you go.. My comfort food.. Is it yours as well??


Sunday, June 2, 2013

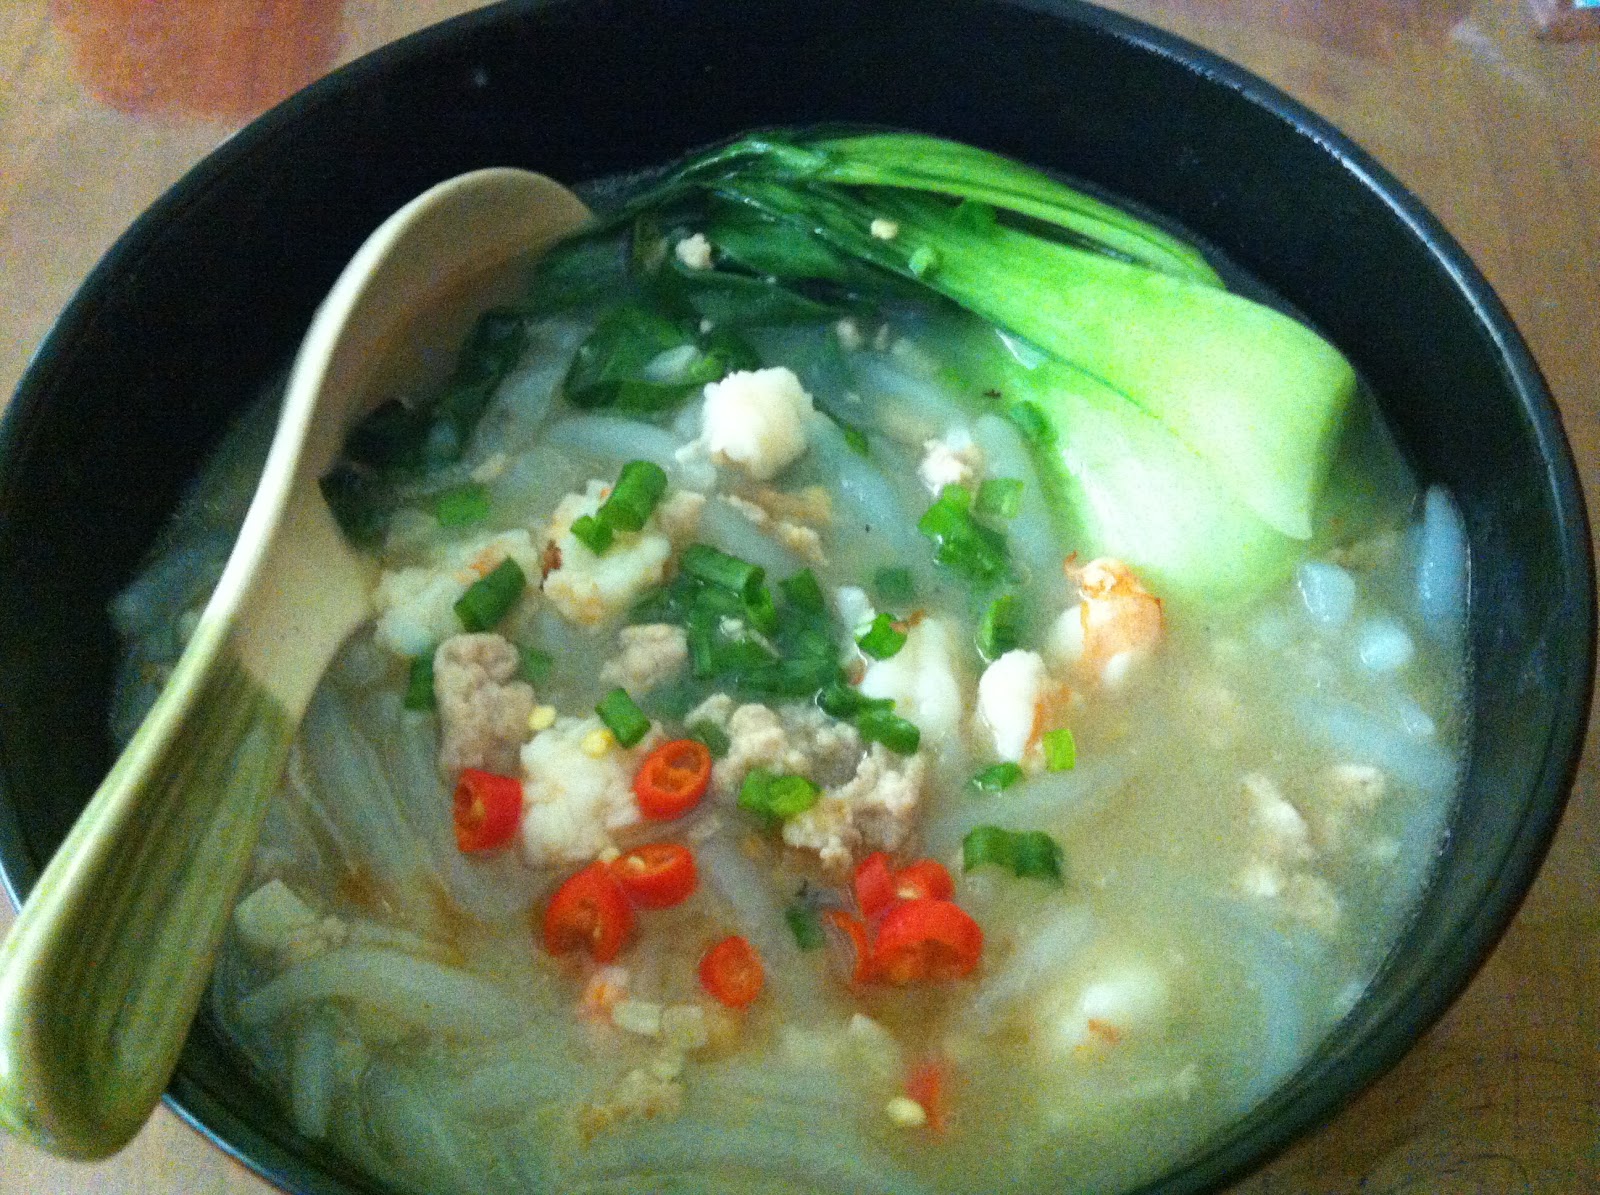
Mee Tai Mak with Salted Fish

When I was younger, I used bring my group of poly classmates to Seremban, a small town in Malaysia to eat a dish called "Claypot Rat Noodle" or in cantonese we called it "Sa Po Lou Shu Fen".

Yummy Lou Shu Fen~!

Rat Noodle or Lou Shu Fen which also knowns as Mee Tai Mak in Singapore its a type of noodle which looks like a rat tail but shorter and hence the name. Its does sounds kinda disgusting if you are listening it for the first time in your life but I can guarantee you that it doesn't taste anywhere close to a taste of a rat (tho I never tasted a rat before but I assume its disgusting! =P)

Recently my classmates been telling me that they miss the dish and they never forgot the wonderful taste of that dish even tho it has been like more than 10 years and sometimes I even wonder if the shop its still open for business. So, I decided to try my hands in making this dish and hopefully I can cook it myself and let them rekindle that wonderful taste that they have been missing.

Ingredients:

1 packet of Lou Shu Fen/Rat Noodle
4 cloves of Garlic
Green Onions for garnishing
5 prawns (de-viens and cut to tiny pieces)
Minced meat
1 slices of salted fish
3 chilli padi (if you like it spicy)
1 bowl of chicken stock (180ml)
Any type of Green Vegetable

Seasoning for minced meat:

1 tsp of Rice wine
2 tsp of Oyster sauce
1 tsp of Sesame Oil
A pinch of Pepper
Minced meat and prawns

Salted fish, green onions, chilli padi and garlic
Rat noodle / Lou Shu Fen


Chicken stock
Instructions:

1. Stir fry garlic and salted fish till fragrant
2. Add in marinated minced meat and fry till meat are cooked
3. Add in prawns
4. Scoop up minced meat and prawns and set aside
5. Heat up some oil and fry Lou Shu Fen
6. Add in the minced meat and prawns and stir fry together
7. Add in chicken stock and let it simmer till it thickens
8. Add in a pinch of pepper
9. Add in your greens
10. Once the gravy thickens, its ready to serve!
11. Garnish with green onions, chilli padi and a little soya sauce

Before and After (Clearly I was very hungry)

Monday, December 31, 2012

Prawns Ceviche

Recently I managed to catch some private chefs cooking their dishes in a cooking competition organized by Channel 8 named 《食分高下》Simply Exquisite and wanted to put my hand on one prawn dish which won the hearts of the judges and yet it is a simple dish to prepare.

Ceviche is a kind of cold dish that is popular in the coastal regions of the Americas especially Central and South America. It uses different types of seafood like fish and prawns and me being a prawn lover, the choice was clear when I set out to prepare this dish.

The most interesting part of this dish that it doesn't require heat to cook the prawns whereas it uses the acidity of the lemon and lime juice to cook the prawns. But for my case, I pre cooked my prawns in hot boiling water for just a few seconds just to kill of any bacteria and let the acidity of the lemon and lime complete the rest of the cooking. (Unless you are using prawns that are really fresh, I guess to be safe its better to pre cook your prawns in boiling water)

It was a brand new experience for me as I rarely try preparing western food and due to that, the portion that I've prepared was small.

Ingredients:
4 pieces of medium to large prawns (deveined and sliced half)
Lemon Juice (2 lemons)
Lime Juice (15 limes)
Lime peel (skin of the lime)
2 Small Onions (Sliced)
Cucumber (Diced)
Tomatoes (Diced)
Cilantro for garnishing

Directions:
Place the prawns in a flat tray and pour in the lemon and lime juice (make sure that the liquid manage to cover more than half of the prawns
Pour in the lime peel and small onions and make sure they are evenly spread out
Place it for 15 minutes
Flip the prawns to the other side and let it soak for another 15 minutes
Make sure that the prawns are fully cooked inside and outside
Place the prawns and onions with just a small amount of the lime+lime juice (or a few droplets) in a bowl
Add in the diced cucumber and tomatoes
Garnish with cilantro and serve!

Home made prawns ceviche
 
After trying out the ceviche that I've prepared, I realized the lemon taste was stronger and that is probably my lemon juice was more than my lime. Besides that I suggest to use sea prawns rather than grey prawns. I believe that sea prawns are able to bring out the flavor of this dish!

Hope you enjoy and thanks for reading! =)

Saturday, January 21, 2012

Fried Bean Curd Spring Roll 春卷

Bean Curd Spring Rolls
The dishes is coming in HOT!! And this time around it is even hotter cause for the first time in my blog, I will be featuring a Video!! And its a video demonstrating on how to wrap the spring roll using the bean curd skin!! Are you ready to make some yummylicious and meaty spring rolls?!

The vege ingredients finely cubed and chopped
Unlike the normal spring roll which is mainly vegetables, my dad's spring roll or 春卷 where he normally calls it contains meats and vegetables and uses bean curd skin to wrap the ingredients around like a shape of a cylinder or a shape of a "popiah". Actually, I am not even sure if it is called as spring roll or meat loaf in English, but I know we call it 春卷 in my family. =)

The size of the bean curd skin
This spring roll is a favorite among my family especially me and my brothers partly because of the crispy and salty fried bead curd skin once you deep fry it. The preparation of this dish do require some effort but once everything is done, you can store it inside the freezer and bring it out to fry every time you wanna eat it!

Ingredients: (Around 12 rolls)
1.5kg minced meat (pork or chicken based on your preference)
300~500g of Prawns (Minced or chopped to small pieces)
8 to 10 Water chestnuts (cubed)
1 Spring Onions
1 Carrots (cubed)
1 stalk of Coriander Leaves
3 Bean curd skins (cut into 4 pieces each)

Put all seasoning and mix well
Oil for frying

Seasoning:
1 tsp of Five Spice Powder
3/4 tsp of Pepper
1/2 tsp of Salt
1 tsp of Sugar
2 tbsp of Soya Sauce
3~4 tbsp of Oyster Sauce

Directions:
1. Placed the minced meat in a big bowl and put all seasoning in it.
2. Mix the seasoning and the meat evenly and set overnight in the fridge.
3. Put in the prawns and mix well.
4. Pour in all finely chopped water chestnuts, carrots, spring onions and coriander leaves into the minced meat and mix well.
5. Prepare the bean curd skin by cutting it nicely into a rectangle shape. (around the size of a cutting board but smaller)
Placing the meat mixture onto the bean curd skin
6. Place a certain amount of the meat mixture onto the bean curd skin and roll it into a shape of a cylinder. (you can refer to the video below)
7. After using up all the meat mixture, place all the spring roll into a steamer and steam it for 15 minutes.
Steamed Spring Rolls
8. Let the spring roll cool down.
9. Bring a wok and pour in oil and fry it under high heat.
10. Once it turn golden brown, scoop up and make sure to drain off the excess oil.
11. Cut nicely and serve!

The cubed water chestnut makes it crunchy and tasty!

Thursday, January 19, 2012

Sweet and Sour Chicken with Ginger

Alright.. why is there another sweet and sour chicken recipe?? Just because I added some ginger this time so I create another post?? Haha..! No no no.. Not that.. But this dish has always been my all time favorite sweet and sour dish by my beloved dad!! I've always love the gingerly taste that comes along with the sweet and yet sour taste, so I can't help it but to feature it inside my blog and for my future reference too!


This dish again I have to say is a pretty simple dish and the ingredients for it is also easily available in your kitchen!! So its an ideal dish for a quick meal with your loved ones or just for yourself.

Ingredients:
3 pieces of chicken thigh
3 gloves of garlic (finely chop)
Half or 3 quarter of a standard size ginger (sliced thinly)
Oil for frying (chicken)
A cup of Water

Seasoning (for the chicken):
Salt and sugar
Or you can use 1/2 cube of chicken granules/chicken stock

The main ingredients for the sauce
Sauce: (you can adjust based on your liking)
5 tbsp of chili sauce
5 tbsp of ketchup

Alternative for sweet and sour sauce:
Water 250ml
Sugar 350g
Salt a pinch
Brown sugar 120g
White Vinegar 150ml

Directions:
1. Cut the chicken thigh to small pieces and marinate it with sugar and salt. Set aside for 3 hours. (If you prefer stronger taste for your chicken bits, use chicken granules instead)
2. Heat up a wok under high heat and pour in oil
3. Make sure that the depth of the oil is sufficient to cover all the chicken
4. Fry the chicken till 70% cooked (around 10 to 15 minutes depending on the amount of chicken)
5. Scoop up the chicken leaving the oil in the wok
Simmer till the sauce thicken
6. Fry the sliced ginger (to bring out the full flavor of the ginger)
7. Drained the oil leaving ginger and a little bit of oil
8. Put in the garlic and sauteed till light brown
9. Pour in the chicken and stir fry for just a few minutes
10. Pour in water till it covers all the chicken
11. Add in chili and ketchup sauce
12. Taste the sauce and add additional chili or ketchup according to your liking
13. Cover the wok with a lid and let it simmer till the sauce thicken
14. Scoop up and serve!

You can try using other poultry as well and I am sure it will taste as good because for me, the main actor in this dish is the sauce. Sometimes you just can't believe how easy is to cook a good sweet and sour sauce. And besides that, adding some corn flour to the chicken before frying can make it crispier and I shall try that the next time around!

Tuesday, January 10, 2012

KL Hokkien Noodle (Tai Lok Min)

When I was young, I used to travel to KL with my parents to visit my uncle near Cheras and every time without fail, my uncle will always buy a packet of dark thick noodles wrapped nicely with newspaper. That packet of noodles will be finished within a few minutes and that noodles is the famous KL Hokkien Noodle! And in KL, they called it "Tai Lok Min" meaning Big Fat Noodles in Cantonese. Ever since that, this dish is a "MUST-EAT!!" for me every time I set my foot in KL.


What set the normal Hokkien Noodle that you find in Singapore or any other part in Msia from KL is the thick black gravy that is coated around the thick noodle and the generous amount of fried lards and lastly the sambal belachan that adds make this dish so sinfully delicious!
Fried Lard
One of the main ingredients for this dish is non other than the crispy fried lard! And in order for this dish to be tasty, you have to be generous in putting the fried lard and of cause it has to be crispy! But for home cook version, we try to reduce it for health purpose. 

I was telling my dad about this dish the how I missed this dish and within the next day, I saw him bringing out a packet of thick yellow noodles to demonstrate to me how to cook a plate of KL hokkien noodle!
Thick flat yellow noodle
The noodle my dad use is not 100% the same as those in KL which is thick and squarish because you can't get those in the local wet market. So, we have to settle with what we can get which is thick but FLAT! 

Ingredients:
500g of thick yellow noodles
300g of prawns
cabbage
1 piece of fish cake
5 cloves of garlic
Fried Lard
Fried Shallots
500ml of water/stock

Seasoning: (adjust according to your taste bud)
Sweet sauce
3 tbsp of Oyster Sauce
Pinch of Salt
3 tbsp of Dark Soya Sauce
1 tbsp of Sweet Sauce

Directions:
1. Heat up at wok under medium heat and sauteed the garlic till light golden brown.
2. Add in the water and let it boil under high heat.
3. Add in the seasoning and blanched noodle.
4. Let it simmer under high heat and cover it with a lid.
5. Add in the fish cake, cabbage and prawns and mix well.
6. Simmer until the gravy thickens. (around 5 mins)
7. Lastly, add in a spoonful of fried lard and fried shallots.
8. Scoop up and serve!


Comparing to the authentic KL Hokkien Noodle, it is less darker but the taste is still there. If you prefer it to be darker, just add in more of the dark soya sauce. And besides that, if you want to make this dish tastier, try using pork bones and ginger to make the stock, so you can use the stock instead of water. =)

To catch a glimpse of the true KL Hokkien Noodle, you can drop by http://ieatishootipost.sg/2011/07/kong-kee-seafood-restaurant-taste-of.html. It is a blog post regarding one restaurant in Geylang Lorong 31 which serves it. I tried it a couple of times before and it do taste similar to those you get in KL.

Tuesday, December 13, 2011

Lou Mai Kai 糯米鸡


Lou Mai Kai is a popular Dim Sum dish and it is actually steamed glutinous rice topped with marinated chicken and mushrooms.

Lou Mai Kai is one of my favorite Dim Sum dish and I always complaint that the ones found in Singapore is not as nice as those in Malaysia because it seems that those in Singapore are factory made whereas Malaysia are home made. Singapore ones are lighter in color, light brown while Malaysia ones are dark brown. Heavier in oyster and dark sauce flavor which suits my taste more.

Marinating all the seasoning to the chicken
Ingredients:
2 Chicken Thigh
300g of Glutinous Rice
3 Pieces of Chinese Dried Mushroom (soaked and sliced)
3 Gloves of Garlic (cut into small pieces)
2 Pieces of Chinese Sausages (optional)

Seasoning: (chicken)
1 tsp Five Spiced Powder
2 tsp Dark Sauce
2 tbsp Oyster Sauce
2 tsp Dark Sweet Sauce
Pinch of Salt

Seasoning: (Glutinous Rice)
1/2 cube of chicken stock
Dark Sauce

Directions:

Preparations:
Marinate the chicken with all the seasons and leave it for at least 2 hours
Soak the glutinous rice in water for 4 hours
Soak the mushroom in a bowl of water till soft (approx 1 hour)
Slicing of the mushroom
Simmer the chicken for approx. 15~20 mins
1. Heat up wok with oil under medium heat
2. Sauteed the garlic till light brown
3. Place the marinated chicken in the wok and stir fried under high heat
4. Add in the mushroom
5. Add in water to simmer the chicken for approximately 15 to 20 minutes
6. Get a large flat bowl and placed the cooked chicken in it. (Spread it across the bowl evenly)
7. Add in the glutinous rice into the wok and stir around with the remnants sauce around the wok
8. Add in chicken stock and black sauce and stir evenly
9. After 3 mins, scoop up the rice and place it on top of the chicken inside the flat bowl
10. Add some water till it forms a thin layer of water above the rice
Steam the bowl for 30 mins
Fill a big wok with water and place the bowl inside to steam it for 30 mins.
Scoop up and serve! For photo shot purpose, I scoop it in a small bowl                                                    

Hope you will enjoy this dish as much as I do~!

Friday, November 18, 2011

Pork Trotters with Radish (Hakka Style)

Braised Pork Trotters Hakka Style
My dad told me that this dish was taught to him by my late grandma (mother side) and the tomato sauce based pork trotters is uncommon compare to those black vinegar that you can find in the hawker center. Personally for me, I am not a big fan of vinegar hence, this dish beats the latter hands down!!

Besides that, my siblings and me have been eating this since we were kids and it is an all time favorite for ALL of us especially my brothers!! I have this rare opportunity to witness my dad cooking this dish recently and I was quick to snap up some pics and not forgetting the recipe for this wonderful dish! It is a pretty easy dish and the ingredients are easily available at your nearest supermarket.


Ingredients:
2 White Radish
A handful of Dried Chillies (as shown on the picture above)
8 to 9 Shallots
500g of Pork Trotters
8 tbsp of Tomato Sauce
2 Bowls of Water (around 1000ml)
3 tbsp of Oil

Directions:

1. Prepare a big pot and pour in some oil under medium heat
2. Pour in the pork trotters, shallots and dried chillies and stir fry till the pork's surfaces turn golden brown.
3. Add in the water
4. Add in the tomato sauce and let it simmer for 30 minutes under low heat.
5. Finally, add in the radish and let it simmer for another 90 minutes or until the meat turn soft and radish is soft at the outside but crunchy in the inside.
6. Dish out and serve!! (Easy right?!!)

Succulent pork.. Yummy~!

Wednesday, October 26, 2011

Braised Pork Bellies with Tofu and Egg

Looks like kway chap too!!
If you are a fan of pork bellies, this mouth watering dish will certainly win you over! And the best thing is it is very easy to prepare and it goes well with rice!!
Star Anise
One of the main seasoning that is used for this dish is star anise and five spice powder (五香粉).  Star anise is normally used in slow cooked dishes that characterize Eastern Chinese cuisines. And coincidentally, the five spice powder we are using for this dish contains star anise in it as well. Be careful not to put too much of the spice blend into your dish as the food gets bitter if too much of it is being used. Both of these seasoning are easily available in either Chinese drug store or dry good shop.

Ingredients: (For 4~5 person)
500gram of Pork Bellies (pan fried first - optional)
5 ~ 6 pieces of Tofu (sliced)
6 Hard Boiled Eggs
1 liter of Water (use stock if possible, it will enhance the taste of the whole dish!)
Caixin (pan fried with garlic)
Can choose to add in meat balls, fried bean curd or even pig intestine.

The seasoning
Seasoning: (rough estimation, do taste it to adjust to your taste preference)
4~5 cloves of Garlic
6~7 slices of Ginger
1 and a half tsp of Five Spice Powder (五香粉)
2 tsp of Sugar
1 tsp of Salt
4 pieces of Star Anise
2 tbsp of Black sauce

Once you have all the ingredients needed, you are ready to cook!!
Directions:
1.Heat up a pot under low heat and put in the sugar. (beware not to burn the sugar, it will turn to black color)
2. Melt the sugar until it turn brown.
3. Add in water/stock.
4. Add in the remaining of the seasoning and turn on high heat.
5. Taste the sauce and add in salt accordingly to your liking.
6. Let it boil before adding in the pork bellies.
7. Add in the tofu thereafter and follow by the eggs.
8. Let it simmer under low heat for around 90 mins to 120 mins depending how soft you want your pork bellies to be.
9. If you prefer the sauce to be thicker, add in some corn flour mixture (mix with water).
10. Scoop up and topped up with some cooked Caixin at the side.
Serve with plain white rice~~!! Yumeee~!!


This dish goes very well with the special chili sauce that was prepared by my dad which is quite similar to those you eat with beef noodles. I will be featuring the recipe for that chili sauce soon!!

Sunday, October 23, 2011

Penang Assam Laksa (Cooking)

 Directions:
Ginger, torch ginger & Lemongrass
All the spices grinned
Spice Paste:
Pound or grind all ingredients into a fine paste preferably with a food processor or blender.
Add in the water to ensure that the paste is ground efficiently.
Heat up wok without oil and cook the spice paste for about 4 ~ 5 mins until fragrant.
Set aside to cool.

Assam Laksa Soup:
Boil the fish in a big pot
Boil the water in high heat and cook the fish in it.
Remove the fish when it is cook. ( Roughly around 15 ~ 20mins)
Allow the fish to cool and remove the flesh from the bones.
Return the fish bones and simmer for another 20 mins.
Add in the spice paste into the soup.
Add in assam, laksa leaves, and prawn paste.
Add in salt and sugar to taste.
Reduce to low heat and let it simmer for another 30 mins.
Lastly, add in the fish and bring it to boil again. (remember to break the fish to smaller pieces)

Separate the meat from the bones
Noodles:
Blanch the vermicelli in hot boiling water for 7~ 10 mins.

Garnishes are nicely sliced!
Assembly:
Place a serving of vermicelli in a bowl
Spread garnishes on top of the bowl depending on your preferences
Add in the soup (make sure the soup must be hot!)
Squeeze in lime juice
Top up with a spoon or two of Heh Ko according to taste
Serve~!!
Add another tbsp on heh ko to complete your bowl of assam laksa!
Related Posts Plugin for WordPress, Blogger...